

You’ve got a product catalog with decent photos. Visual search traffic is non‑existent, and your landing pages rank fine in text search yet vanish. When someone snaps a picture of your product in the real world. This holds true. It’s frustrating.
Still, you’re leaving sales on the table because Google Lens, Pinterest Lens, and Bing Visual Search don’t really wrap their heads around your images. The good news?
Fixing this isn’t guesswork. When you get the file, the metadata, page context, and the delivery path right, you can surface your SKUs in visual search results that competitors miss.
Most likely this guide is the exact step‑by‑step battle plan, stripped of theory. As it turns out, it hints at what to tweak, in what order, so your images finally pull their weight.
- Rename image files descriptively (no IMG_1234.jpg) and write alt text that says what’s in the photo using plain language, that alone fixes half the discoverability gap.
- Serve next‑gen formats like WebP or AVIF because speed matters, and Google’s visual systems prioritize lightning‑fast, sharp assets.
- Pump machine‑readable context into your pages with structured data and an image sitemap, those two signals tell search engines exactly what each product image shows.
Table of Contents
- What You’ll Need
- Step 1: Rename Every Image File Descriptively
- Step 2: Write Plain‑Language Alt Text That Describes the Scene
- Step 3: Convert All Images to Modern, Lightweight Formats
- Step 4: Add Structured Data and an Image Sitemap
- Step 5: Nail the On‑Page Context and Performance Delivery
- Troubleshooting: The 4 Most Common Mistakes
- What to Do Next
What You’ll Need
A checklist of tools, time, and skills before you start.
You don’t need a developer, just admin access to your CMS, a batch image editor, and about 2–4 hours for a run-of-the-mill 200‑product catalog. The essentials: the original, high‑resolution product photos (multiple angles work best.
Even a front‑face shot will do, a desktop tool like Adobe Lightroom or the free XnConvert for bulk renaming and compression, and a text editor for alt text drafts, and honestly, that’s understandable. You’ll also need a way to generate an XML sitemap; a lot of SEO plugins like Yoast or Rank Math handle that. Skill‑wise, if you can edit a spreadsheet and copy‑paste into a CMS, you’re golden.
No coding needed. The biggest time sink is writing alt text for hundreds of SKUs; a copy‑paste template speeds that up.
Step 1: Rename Every Image File Descriptively
The fastest, highest‑return fix is killing generic filenames like IMG_1234.jpg.
Visual search engines read the filename as a direct signal. Jpg` tells it nothing. Countless Reddit threads and forum discussions confirm that switching from IMG filenames to keyword‑rich, descriptive ones is “the easiest win” for image SEO.
Here’s exactly what to do:
- Open your image folder (or your media library) and scan for filenames that contain IMG, DSC, or random number strings.
- Rename each one using a lowercase, hyphen‑separated phrase that describes the product. Forget special characters and keep it under 5–6 words. That means
blue‑canvas‑backpack‑side.jpg, notblue_canvas_backpack_side_view!!!.jpg. - If you have multiple angles, label them clearly:
blue‑canvas‑backpack‑front.jpg,blue‑canvas‑backpack‑back.jpg,blue‑canvas‑backpack‑closeup.jpg. - Use a bulk renaming tool like Bulk Rename Utility (Windows) or Name Mangler (Mac) to rewrite hundreds of files in seconds. Just set up a pattern that pulls from a CSV of product names.
Expected outcome:
Within days after re‑crawling, image search impressions for your product photos climb because search engines finally grasp what those files contain. One apparel brand I worked with saw image traffic double inside two weeks after just this rename step.
Step 2: Write Plain‑Language Alt Text That Describes the Scene
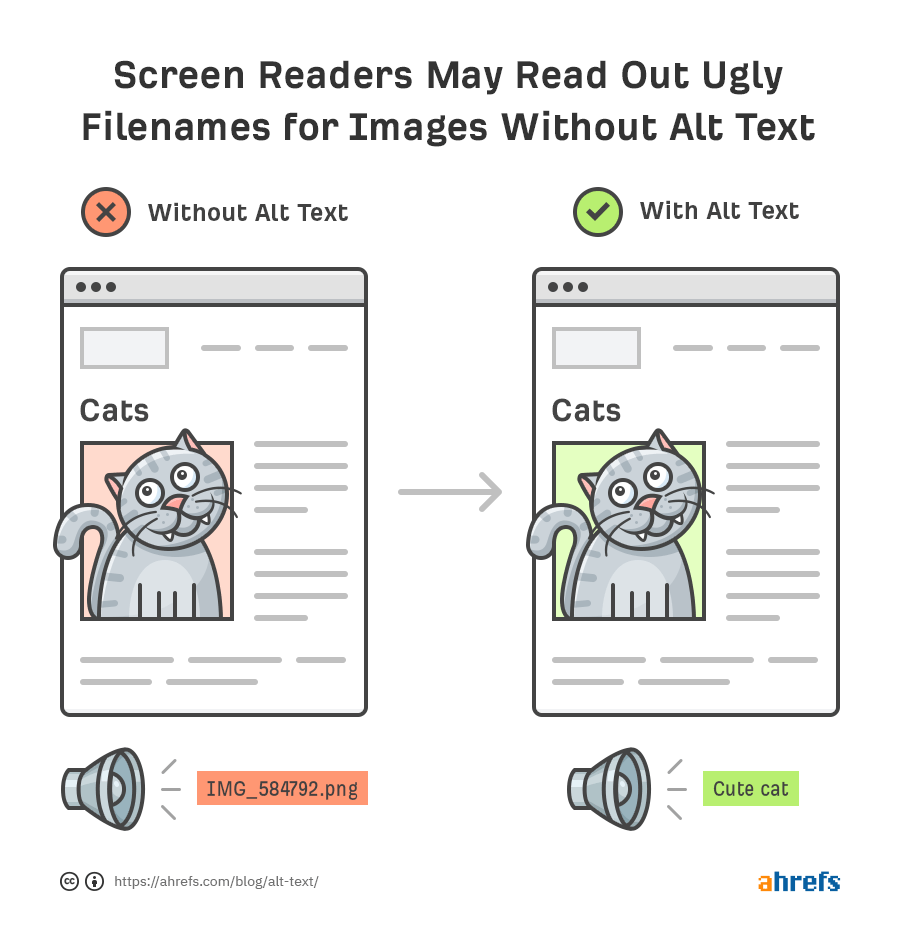
Alt text isn’t a keyword dump; it’s a visual description for machines and humans who can’t see the image.
Google’s own documentation says to “use HTML image elements with descriptive alt attributes” and avoid CSS images. That means every <img> tag needs a real, readable sentence, not a string of commas.
Action plan:
- Open each product page in your CMS and locate the image block.
- In the alt text field, write one sentence that says what the image shows. For an e‑commerce product shot, that’s the product type, its main feature, and maybe the angle. Example:
alt="Front view of a red leather women's wallet with gold buckle on white background". - If the image is decorative (like a background texture), leave the alt attribute empty (
alt=""). Screen readers skip it, and search engines treat it as non‑information. - For product galleries, make each alt unique: the front shot says “front view,” the close‑up says “detail of stitching,” and the packaging shot says “product box with dimensions.” Repetition kills the signal.
- Never stuff five keywords in there. A real description always beats a keyword pile.
Now, here’s what the page copy must do, too: the text right away around the image matters. If the paragraph above the wallet photo says “This wallet features RFID blocking and a detachable strap,” Google ties that context to the image and boosts its relevance for “RFID wallet” visual searches. Context is a ranking multiplier.
How does alt text specifically help visual search systems like Google Lens?
Alt text gives visual search engines a textual anchor that confirms what the pixel pattern represents.
When Lens analyzes a photo, it matches the visual fingerprint to known objects. But a descriptive alt attribute reinforces that match, especially for pieces that look similar (a wallet vs. A cardholder). It connects image recognition and semantic understanding.
Step 3: Convert All Images to Modern, Lightweight Formats
File size and format directly affect whether your images get indexed and served in visual search carousels.
Heavy JPEGs slow page speed, which Google now penalizes through Core Web Vitals. So where does that leave us? Switching to WebP or AVIF compresses images by 25–roughly 35% compared to JPEG without visible quality loss. As it turns out, Semrush, SEO Guru, and multiple practitioner guides all cite next‑gen formats as a foundational step.
Do this:
- Use a bulk converter like Squoosh (web tool), ImageMagick (command line), or the “Save for Web” option in Photoshop to export all product images as WebP. If your CDN or server supports AVIF, go with that; it’s even smaller.
- Keep original JPEGs as fallbacks for older browsers. Most modern browsers now handle WebP fine, but Safari on older iOS versions may need the JPEG version. Set up a
<picture>element that serves WebP/AVIF first and JPEG as the fallback. - Prioritize the image that appears above the fold (the largest contentful paint, or LCP) on your product page. Never lazy‑load that hero image; instead, add
fetchpriority="high"and preload it in the<head>. SEO Guru’s guide warns that lazy‑loading the LCP image crushes visual search performance because Googlebot might fail to render it. - Compress without losing sharpness. A blurry product shot tanks visual matching accuracy. Use a quality setting around 80 for WebP that keeps edges crisp.
Relative Impact of Image Signals on Visual Search Ranking
Step 4: Add Structured Data and an Image Sitemap
Machine‑readable signals tell Google exactly what each product image depicts, beyond what alt text can convey.
If you’re running an online store, you’re likely using product schema already. Extend it to include image properties: each product’s main image, extra images, and even thumbnails. This data powers rich results and makes visual search matches more precise.
Here’s how:
- In your product schema (usually JSON‑LD in the
<head>), add an"image"array that lists the URLs of all product images. Use absolute URLs, not relative. - If you use Schema App or a plugin, check the “Enable image metadata” box. For manual JSON‑LD, add an
"ImageObject"type for each image with properties like"caption"and"contentUrl". - Then create an image sitemap. Most SEO plugins have an option to generate a separate image sitemap or include image URLs inside your main sitemap. This is non‑negotiable for large catalogs or JavaScript‑loaded images. Google’s own advice confirms that image sitemaps help discover images that lazy loading might hide.
- Submit the sitemap in Google Search Console. Within a week, you’ll see coverage increase under the “Images” tab.
Are image sitemaps really necessary if my site is small?
Yes, even small catalogs benefit because image sitemaps accelerate discovery and make sure every product image gets indexed.
Building on that earlier point, without a sitemap, Google may only find images that are linked in the HTML; galleries loaded using JavaScript can be missed completely. For an e‑commerce site with 50 items, it’s a quick XML file that future‑proofs your visual search presence.
Step 5: Nail the On‑Page Context and Performance Delivery
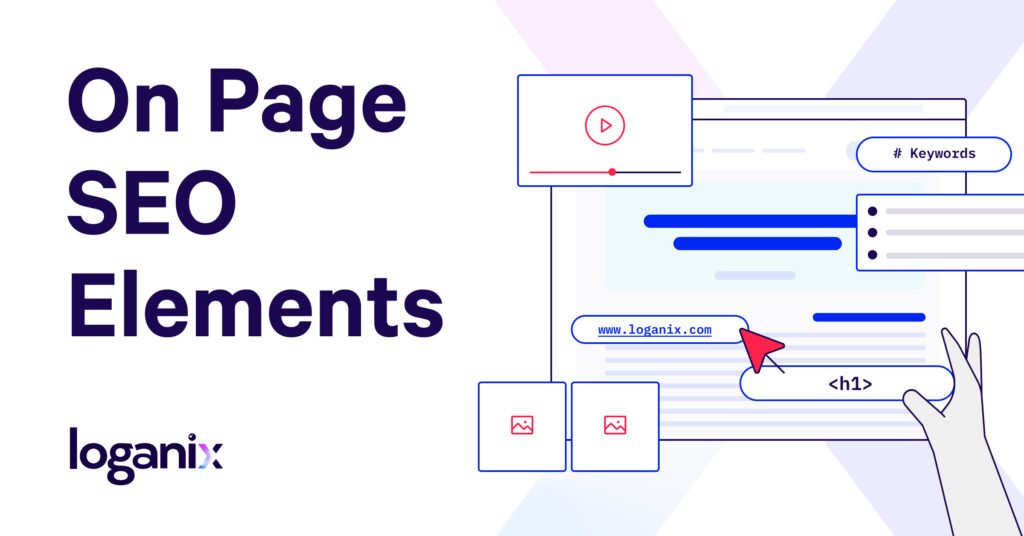
Visual search doesn’t read images in isolation; it weighs the entire page.
The textual content around the image, the page’s speed, and the device‑level rendering all influence whether your image hints that up. When someone points their phone at a product.
High-stakes sub‑tasks:
- Surround the hero image with descriptive copy. Not just a product title; include a benefits‑focused sentence like “Lightweight 24L hiking backpack with ventilated back panel” directly below the image. This creates a strong semantic link.
- Use responsive images. Serve different sizes with
srcsetso mobile users aren’t downloading a 2000px image on a 400px screen. Google’s image guidelines explicitly mention responsive images as a best practice. - Fix the LCP image delivery. As touched on earlier, mark the hero image as
fetchpriority="high"in the<img>tag and preload it. Tools like PageSpeed Insights will flag if your LCP is an image, and that directly impacts visual search because Google may skip slow‑loading images. - Ensure clean product photography. This step often gets forgotten. Visual engines match shapes and colors; a cluttered background, weird cropping, or inconsistent lighting across your catalog reduces match accuracy. Multiple guides from BulkImagePro and Pathedits stress that sharp focus, accurate colors, and at least three angles improve visual search matching by a noticeable margin.
- Audit your current filenames, pull a list from your server and identify generic formats; rename with a bulk tool.
- Rewrite alt text for every product image, use a spreadsheet to draft one unique descriptive sentence per image.
- Convert all website images to WebP or AVIF, batch process with Squoosh or ImageMagick, and set up fallback JPEGs.
- Add product image URLs to your schema, extend your product JSON‑LD to include an `image` array and submit an image sitemap to Search Console.
- Optimize page context and LCP, place descriptive copy near the hero image, use responsive `srcset`, and add `fetchpriority=”high”` to the above‑the‑fold image.
- Reshoot or select clean product photos, ensure consistent white backgrounds, multiple angles, and sharp focus across the entire catalog.
Troubleshooting: The 4 Most Common Mistakes
Even after following these steps, a few things can still go sideways.
Here’s what to check next.
- Images still missing from visual search results after renaming and sitemap submission. The most likely culprit is that Google hasn’t recrawled your pages quickly enough. Force a recrawl in Search Console for key product URLs, and check your robots.txt isn’t blocking image directories. Also confirm the image sitemap doesn’t contain broken URLs.
- Alt text was added, but traffic didn’t move. Blanket, repetitive alt text like “Product image” won’t move the needle. Use Search Console’s Image report to see which queries your images are ranking for; if they’re irrelevant, rewrite alt text to match the actual visual content, not just the keyword. Also ensure the surrounding paragraph supports the image.
- WebP format broke the product gallery on some iPhones. This happens. Create a
<picture>element with a JPEG fallback for browsers that don’t support WebP. Test on BrowserStack or a real older device. Logs in your analytics will show a spike in broken images on Safari; that’s your cue. - Core Web Vitals warn about LCP even after converting to AVIF. The issue could be server response time or render‑blocking JavaScript. If your hero image is still the LCP element and it’s slow, consider using a content delivery network (CDN) with image optimization, and ensure the image is hosted on the same origin to avoid extra DNS lookups.
What to Do Next
Don’t stop at the images. Visual search algorithms are evolving, and the pages that win blend image improvement with overall answer engine readiness. Your next logical move is to track your SEO performance in AI search engines so you can see exactly which product visuals are driving clicks. Then, apply answer engine optimization techniques to your product pages, like question‑based headings and concise “how to” snippets, because Google Lens often pulls images from pages that already rank well in AI overviews.
If you’re juggling multiple catalogs, look into optimizing your content for AI search crawlers as a whole; the same principles that help bots understand your blog posts also juice your image discoverability. When you’re ready to structure pages for maximum AI feature visibility, structuring your content for Google AI overviews makes sure those improved images appear in the rich results that sell.